




TL;DR
Creating a professional signing experience involves more than just document signatures; it includes customizing communication to reflect your brand. With Salesforce eSignature, you can streamline this process by setting up a Business Unit and personalizing your signing invitation emails. This guide outlines the steps to create a Business Unit, customize email templates, and ensure a consistent and branded signing experience for recipients, ultimately enhancing engagement and clarity in the signing process.
A professional signing experience is not only about getting documents signed. Your emails also represent your brand and help recipients understand what they need to do. With Salesforce eSignature, you can create a more consistent signing experience directly within Salesforce.
In this guide, we will walk through how to create a Business Unit, customize your signing invitation email, and send a document using your customized template. You can also see how eSignature for Salesforce helps you personalize communication while keeping the signing process simple for recipients.
Here are the steps to customize your email template in Sign Made Easy.
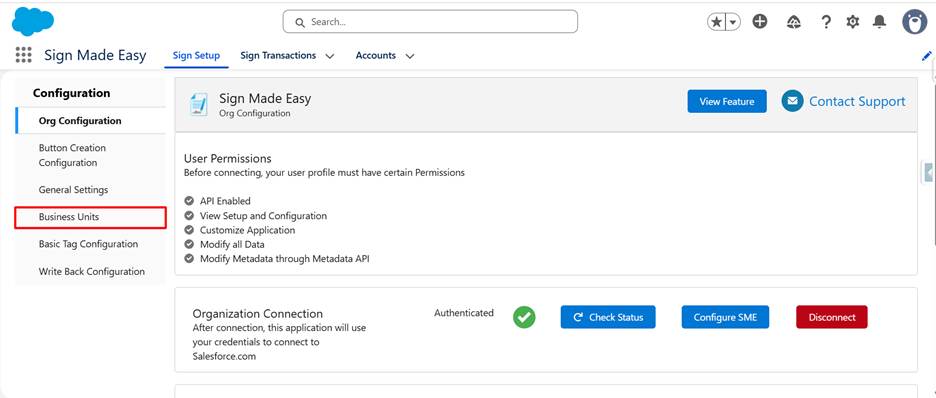
Step 1: Navigate to the Sign Made Easy app. Click on the Sign Setup tab in the top navigation bar, then select Business Units from the left-hand configuration menu.
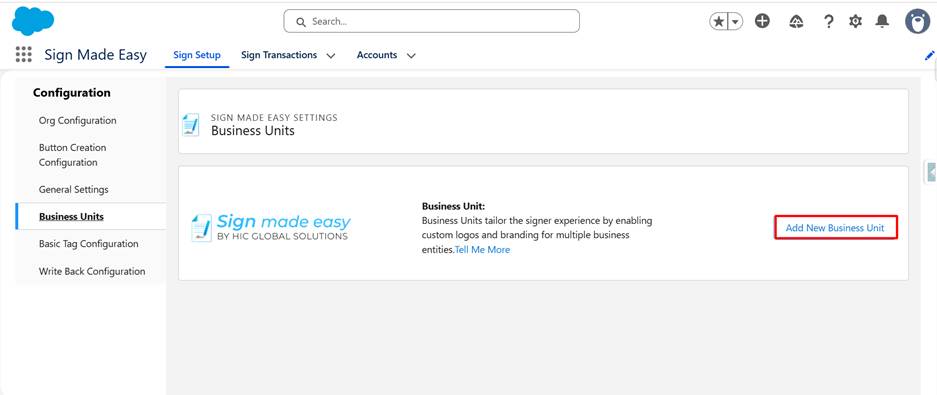
Step 2: Click the Add New Business Unit button to begin creating a new unit for your organization.
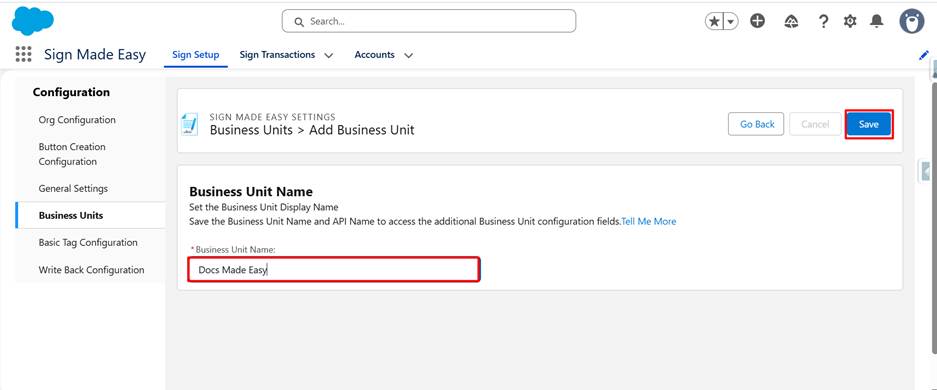
Step 3: Enter a suitable name for your Business Unit in the Business Unit Name field. Once entered, click the Save button to create the Business Unit.
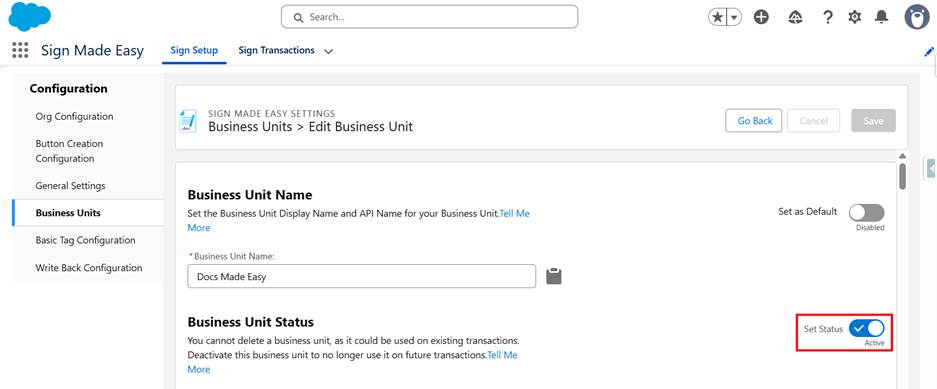
Step 4: Set the status to Active to enable it for use across your organization.
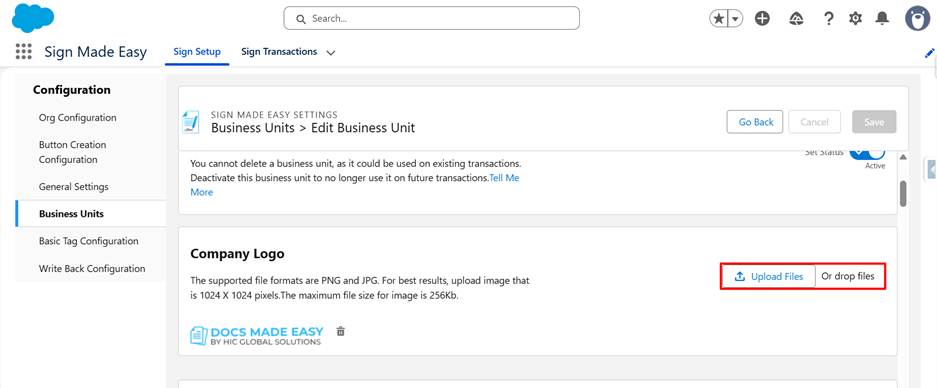
Step 5: Upload your company logo to appear in all outgoing email communications sent from this Business Unit.
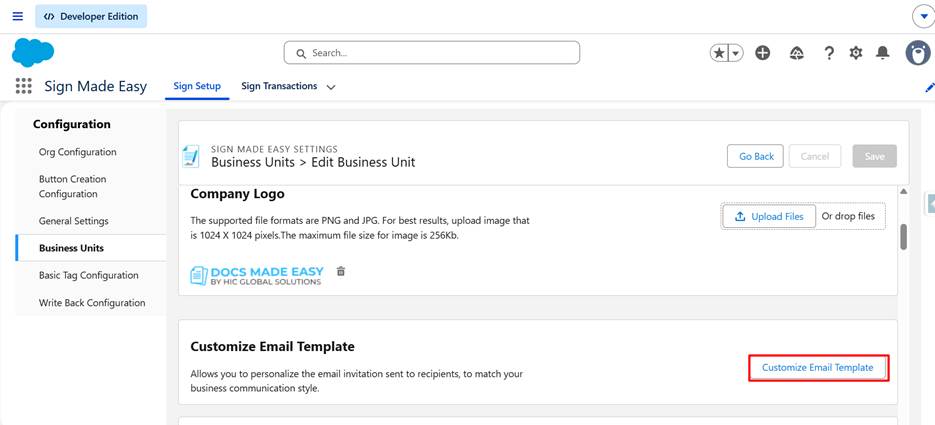
Step 6: Click on the Customize Template button within the Business Unit configuration. This will open the Email Template customization panel.
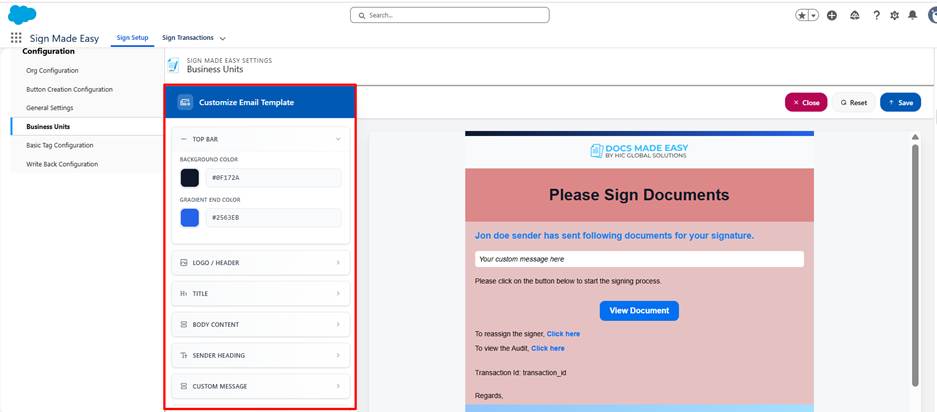
Step 7: The customization panel will open with sections including Top Bar, Logo / Header, Title, Body Content, Sender Heading, Custom Message, Button, Reassign & Audit, and Company Address, etc. Adjust each section according to your branding and messaging preferences, then click Save to apply your changes.
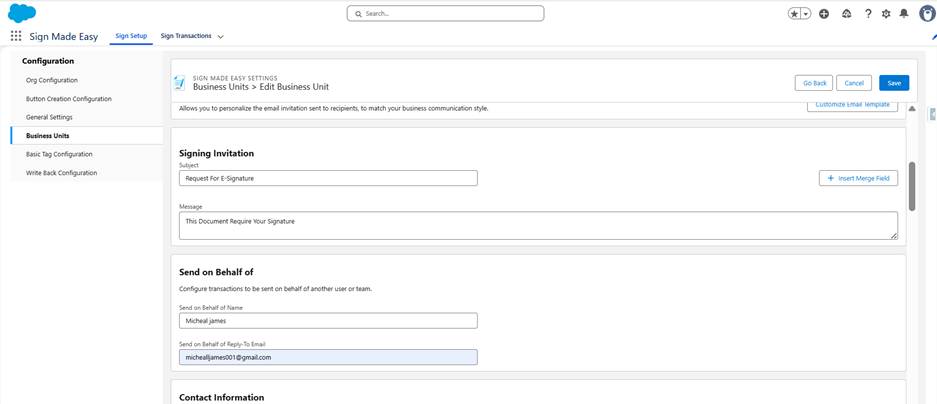
Step 8: Fill in the remaining configuration details for the Business Unit, including Signing Invitation settings, Send On Behalf options, and Contact Information. Click Save to finalize the Business Unit setup.